
What You Need to Know About Fluke Meters and How to Calibrate Them
A multimeter is an electronic measuring instrument that can measure voltage, current, and resistance. The term “multimeter” is a combination of the words “multi” and “meter”.
A Fluke multimeter is a type of multimeter that measures AC and DC voltage, AC and DC current, resistance, frequency, continuity testing (of live circuits), diode test, transistor test (P-N-P), transistor test (N-P-N), capacitance measurement and temperature measurement.
How To Tell If a Multimeter Needs Calibration?
The multimeter is a device that measures voltage, current and resistance. These three parameters are the most important for electrical measurements. The multimeter is an indispensable tool in the process of testing electrical circuits.
In order to calibrate the multimeter, it is necessary to measure its parameters with a known standard resistor. If these parameters are not equal to each other, then it needs calibration.
How Do I Calibrate a Fluke Multimeter?
Calibrating a multimeter is an important step in ensuring accurate readings.
The first thing to do is to set the meter on a known voltage, such as 120 volts. Then, you will need to measure the voltage of another circuit that has the same voltage as the first circuit. Next, you will need to subtract the second reading from the first reading and divide by two. This will give you your calibration factor for your meter. Finally, apply this calibration factor to all of your readings until you calibrate again or change meters.
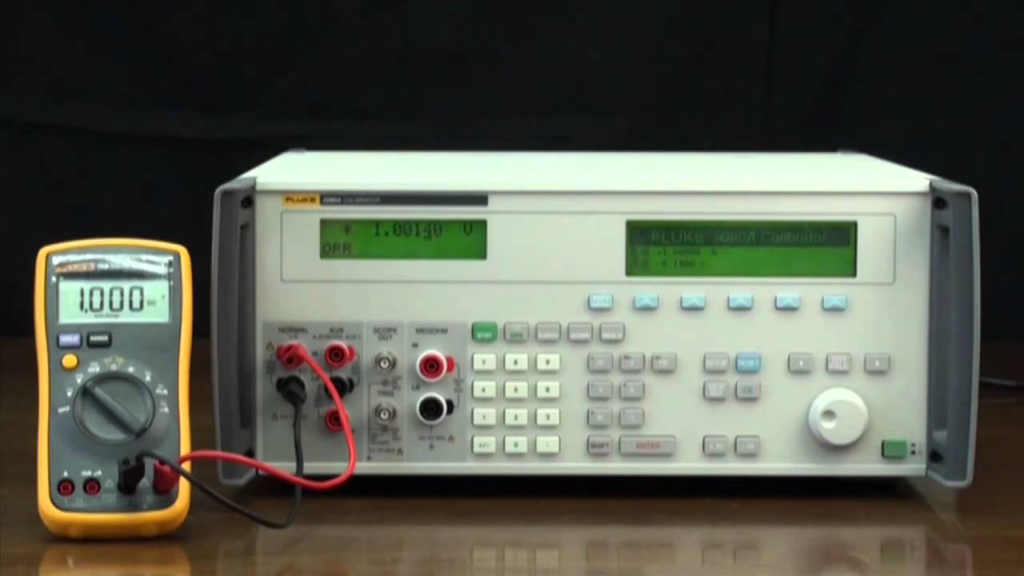
How to Calibrate Fluke 87 Digital Multimeter Using Fluke 5522A Calibrator?
The calibration of the Fluke 87 Digital Multimeter is essential to ensure accuracy in measurements. The Fluke 5522A calibrator is one of the most reliable and accurate calibrators available in the market today. The calibration procedure for this multimeter is straightforward and can be carried out with ease by following the steps below:
- Switch off the power supply to both meters before connecting them.
- Connect the black lead from the calibrator to earth ground, then connect the red lead from it to any pin on the back panel of the multimeter, then connect black lead from the multimeter to any other pin on the back panel of the calibrator.
- Turn on the power supply and press the RUN/STOP button on the front panel of the calibrator.
- Press the CALIBRATE button on.
- That’s it!
Self Calibrating a Fluke Multimeter
Self calibrating a Fluke multimeter is an easy process that can be done in the span of 5 minutes. The first step is to set the multimeter to the range that you want it to be calibrated for. It can be set for DC voltage or AC voltage, or for resistance measurements.
Next, you will need to select the parameter that you want to calibrate from the menu and press enter on your keyboard. You will then need to enter in a value for this parameter and press enter again on your keyboard. Finally, you will need to select “enter” from the menu once more and then press enter on your keyboard.
Final Words
In conclusion, it is important to check the voltage before and after calibration on your new Fluke multimeter. This will ensure that the meter is working properly and it will also help you in many ways.